Chicks and Chick Rearing
Lamps
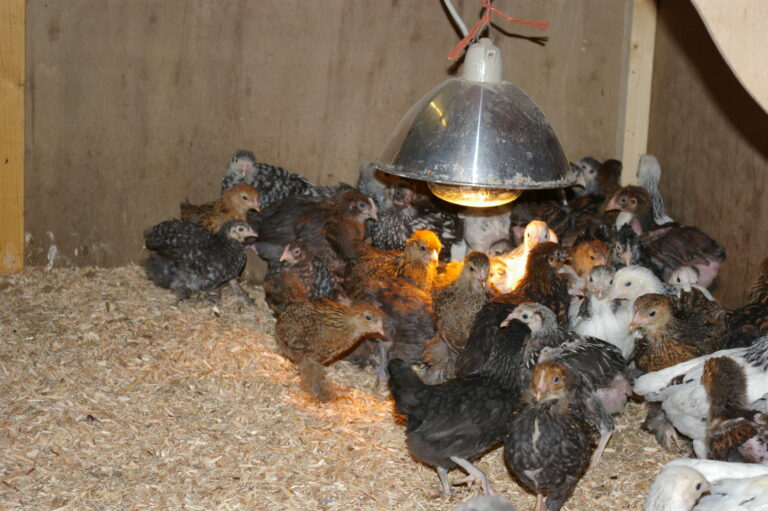
Infrared lamps provide a convenient heat source for brooding chicks. Use porcelain sockets approved for these lamps and suspend the lamps with chain or wire, not the electric cord. Ideally they should be no closer than 40 cms to the litter.
If the average brooder house temperature is 50 degrees F, one 250 watt infrared lamp is sufficient for 80 chicks. One chick can be added to this estimate for every degree over 50 degrees F. You should use more than one lamp so the chicks will not be without heat if a lamp burns out. Supply more heat by lowering the lamps to 35 cms above the litter or by using more or higher-wattage lamps. To reduce heat, turn off some lamps, use smaller lamps, or raise the lamps to 60 cms above the litter. You are heating the chicks only and not the air. Therefore air temperature measurements cannot be used as a guide to chick comfort when using infrared lamps.
Brooders
Small brooders with an electric heating element can be purchased for brooding small numbers of chicks. Variations of a simple light bulb brooder can be made using Figure 1 as a guide. Change the bulb size in this unit to adjust the temperature. Most of the larger brooders use gas or oil as fuel to more adequately supply heat.
When using a brooder, start the chicks at 90° to 95° F, measured 50 mm off the floor under the edge of the hover. Reduce the temperature by 5° per week until the supplemental heat is no longer needed. Observe the chicks to gauge their level of comfort. If they crowd together under the brooder, increase the heat. Lower the temperature if they tend to move away from the heat source.
Start the brooder the day before the chicks arrive and adjust to proper operating temperature.

Space and Equipment Recommendations
Provide half a square foot of brooder house space per chick from day 1 to 6 weeks of age. Allow 1 ½ to 2 square feet of floor space for Leghorn pullets. Allow 2 to 2 ½ square feet for heavier breed pullets confined during the growing period.
Place feed on chick box lids or trays from cut-down card-board boxes for the first few days. Alternatively use plastic trays that have many uses as a tray or turned upside down as a plinth etc.
Feed and water should be available to the chicks as soon as they arrive or have just hatched and dried of. Provide 25 cm of feeding space per chick at the hoppers at first. Increase to about 50 cm after chicks are 2 weeks old. After 8 weeks, provide 75 – 100 cm of feeding space for growing pullets. A hanging tube-type feeder 40 cm in diameter will feed about 30 birds. Less feed is wasted by filling hoppers only half full and adjusting feeder height or size to bird size.
Water fountains
Provide a 5 litre water fountain per 50 chicks during the first 2 weeks. Increase the number or size of waterers as they grow. Perches may be used with pullets after 6 weeks of age. Use poles of 50 cm with top edges rounded and placed 30 to 40 cm apart. The perches can be on a slant, from floor level to about 60 cm high at the rear. Alternatively it can be placed on a screened platform over a droppings pit. Allow 15 cm linear of roosting space for pullets.
Feeding
For the small flock owner, a complete feed obtained from your local feed dealer is convenient. Follow the directions provided by your local supplier. A starter mash is generally fed for the first 6 to 8 weeks. Pullets are then fed a grower/developer mash until they lay at about 20 weeks of age. They should be fed a laying mash when they start to lay eggs.
Pullets having access to a yard or range can supplement their diet with green feed. Chicks or pullets should have some chick- or pullet- size grit available at the appropriate age. Try to keep your growing pullets within body-weight guidelines provided by the breeder.

Health and Sanitation Practices
Isolation from other birds is the first rule in preventing disease. Restrict unnecessary traffic of people and pets into the poultry house. If different ages of chickens are present on the farm, physically separate the flocks as much as possible and care for the younger birds first. Disease and parasite control will be easier if the birds are kept confined. Rotate yard and range areas so that birds are not on the same ground year after year.
Keep the premises free of rodents and screen free-flying birds from the poultry house. Good sanitation and a low-level coccidiostat drug in the feed during the brooding and growing period will usually prevent coccidiosis.
Examine birds occasionally for lice and mites. A local veterinarian, can assist you with flock health and other management problems or will direct you to a competent source of help.
Clean waterers daily and periodically wash with a sanitizing solution. Maintain litter in good condition and remove caked and wet spots. Add additional litter as necessary. Adjust ventilation to avoid moisture and ammonia build-up in the house.
Cannibalism
Cannibalism often occurs in growing and laying flocks and is difficult to control once it has started. Various factors contribute to cannibalism, including crowding, nutrient deficiencies, inadequate ventilation, too little drinking and eating space. Other reasons are too much light, idleness, and the appearance of blood on injured birds. Good management can frequently control many of these contributing factors.
In many small flocks, a pick-paste remedy can be used with success if the problem has not gotten out of hand. Beak trimming is a more permanent solution to the problem. Birds can be beak- trimmed at any age if done properly, but avoid times of stress or pullets production time.
Good layers develop from healthy, well-bred chicks raised under good feeding and management programs. The best hens for egg production are the small-bodied commercial Hybrid strains with a high rate of egg production. These also yields a lower production cost per dozen eggs. Popular hybrid layers are White Star, ISA Brown, Sussex Star, Blue Belle, Black Rock, Black Tails etc.
Housing and Equipment
Housing requirements for brooding and rearing chicks and pullets can be quite minimal if done in late spring and summer. Almost any small building that meets the floor-space requirements for the desired-size flock can be used. A small number of chicks can even be brooded in a corner of a garage. After the brooding period, pullets can be reared in a fenced yard and covered shelter for protection from the weather. You should though make sure you have adequate protection against the fox and other predators.
Brooding, feeding, and watering equipment can be purchased from local feed and farm supply outfits or mail-order houses. Much of the equipment can be home-built. Used equipment may be available locally from farmers who no longer keep poultry. Usually, three sizes of feed hoppers are recommended so birds, as they are growing, can easily eat without wasting feed.
Hanging tube-type feeders that can be adjusted in height as the birds grow are becoming very popular. It is desirable to place a platform under waterers to avoid wet litter. Automatic waterers save labour, even with small flocks.
Cleanliness
The house and equipment should be thoroughly cleaned and disinfected before starting chicks. If chicks have been in the shed previously, remove all the litter and wash the house and equipment with pressurized water. Scrub and scrape all organic matter from building and equipment surfaces. After cleaning, disinfect shed and equipment using an approved compound according to the product manufacturer’s directions.
Dry and air the building and then place 50 to 100 cm of wood shavings, straw, or other litter material on the floor. Place a cardboard fence around the brooding area to confine the chicks to the heat source for the first week. Figure 2 shows one suggested arrangement of the brooding area.


