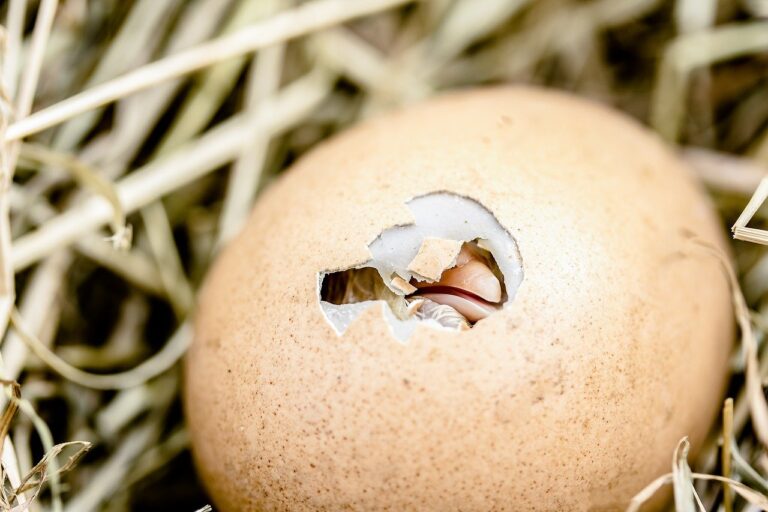
Incubation Information
Your eggs need to settle for at least 24 hours before setting, ideally next to your incubator.
This allows the egg to reach ambient temperature. Eggs should always be stored with the pointy end down prior to incubation. It’s a good practice to follow and it will help your hatch!!!
Incubator ready?
By the time you have got your eggs ready for setting your incubator should have been running at least 24 hours. This gives you time to learn what’s going to happen in your incubator and allows you to make any necessary adjustments before setting your eggs.
A definite way to ruin hatching eggs is to put them in the incubator without having it properly adjusted. If the eggs reach an internal temperature of 105 degrees you can kiss them good-bye. Take note that I said “internal” temperature. Don’t confuse internal egg temperature with internal incubator temperature. The temperature in an incubator changes constantly, rising and lowering. The temperature inside the egg will be an average of this temperature swing in your incubator.
Turning
During the period of incubation your eggs will need to be turned. There are three main ways this is done, manually, semi-automatic, or fully automatic. With the manual method you will simply turn the eggs by hand through 180 degrees at least twice a day. With the semi-automatic turning, you can turn all of your eggs at once often by a lever outside the incubator. The fully automatic system uses a drive system to turn the eggs on a time-based system. The key part about turning is for it to be at least twice a day but ideally a lot more and to be consistent. Incubate the eggs either on their end (small end down) or on their sides.
Temperature and Humidity
This is plain and simple, yet the MOST important part of hatching. Still-air incubator (no fan): 38.5 degrees measured at the TOP of the eggs. Fan Forced incubator: 37.5 degrees measured anywhere in the incubator. Humidity: 40-50% during incubation, 50-65% for the last 3 days. You can sneak by with humidity numbers that aren’t very accurate, but the combination of poor humidity and temperature will definitely cause problems at hatch time. If your temperature is not accurate you will DEFINITELY have problems at hatch time. The bigger the deviation from the proper temperature, the bigger your problems will be!
Is your Thermometer accurate?
Keeping the temperature accurate can be a struggle, even with very good thermometers. I’ve thrown away many thermometers in past years that I had considered reliable. A nice part about running a modern electronic incubator is that you get a very accurate temperature control often with digital displays. After the first hatch, you can raise or lower the temperature by what the hatch tells you. If they hatched early the temperature needs to be lowered. If they hatch late the temperature needs to be raised. You can check your Thermometer this way. Keep notes on everything you do during the incubation period. As you learn you’ll have these notes to look back on. They will be the most valuable tools that you can have. It won’t be long until you can say, “I know what happened, all I need to do is change this one little thing”. Soon you will be able to make adjustments by knowing what to do, instead of guessing!!!
How do I check Humidity?
Humidity is checked by way of a hygrometer (wet-bulb thermometer, or electronic handheld unit) used in conjunction with a regular “dry-bulb” thermometer. A hygrometer is simply a thermometer with a piece of wick attached to the bulb. The wick hangs in water to keep the bulb wet (hence the name “wet-bulb thermometer”). When you read the temperature on the thermometer and hygrometer, you must then compare the readings to a chart to translate from wet-bulb/dry-bulb reading to “percentage humidity”.
From the relative humidity table, you can see…..
60% humidity reads about 87 degrees on a wet-bulb at 99.5 degrees.
60% humidity reads about 89 degrees on a wet-bulb at 101.5 degrees.
80% humidity reads about 93 degrees on a wet-bulb at 99.5 degrees.
80% humidity reads about 95 degrees on a wet-bulb at 101.5 degrees.
Getting your humidity to become as accurate as your temperature is nearly impossible. It is almost completely impossible with a small incubator. Try to get your humidity as close as you can, and you’ll be fine. Just being aware that humidity is important, and trying to get the numbers to come in close will be a huge help to your hatch. If you can hold within 10-15% things should turn out fine. Temperature on the other hand, is CRITICAL!!!!! I hate to beat this point to death, but a small deviation in temperature (even a couple degrees) can and will ruin a hatch. Or, at least turn a potentially great hatch into a lousy one.
An important point about incubator humidity
As seasons change, so does humidity. When you are incubating eggs in January and February it will be very difficult to maintain a humidity that is as high as you like. That’s because the outside humidity is so low. By the same token, when you are incubating in June and July the outside humidity is usually much greater and the humidity in your incubator will most likely get much higher. Hatching problems will change as the season progresses. If you are doing things the same way in July as you were in January, you have to expect different results. All I am trying to say here is that your incubator humidity changes directly according to the outside humidity. Low outside, low in the incubator. High outside, high in the incubator. To adjust for these problems, you need to change the surface area of water in your incubator.
Surface area?
Surface area is “the amount of surface of water exposed to air in your incubator”. The depth of water has absolutely no bearing on the humidity in the incubator (unless the depth is zero). If the humidity is too low in your incubator, add surface area. Place another pan of water in the incubator, or some small, wet sponges. This will help. To decrease the humidity, remove surface area. Use smaller containers of water, or undo some of the things you’ve added.
This information is provided as a guide. Under no circumstances can Perfect Poultry be held responsible for the practical application of this information.